Retirement Annuity Contracts
This section includes the following tabs. Click on a heading to find out more about the boxes on each tab.
| Option | Description |
|---|---|
| Name of company | Enter the name of the company who provide the annuity. This name does not appear on the tax return - it only appears on the Annual Data Navigator. |
| Contract number | Enter the number of the annuity contract. |
| Payments started | Enter when the payments started, if known. If the payments started part way through the year enter the date of the first payment and the total premium for the year will be calculated. |
| Payments ended | Enter when the payments ended, if known. |
There are two payments tabs. The options on each tab are identical, so you can add two separate payments if necessary.
| Option | Description |
|---|---|
| Payment frequency |
Choose a payment frequency from the five options in the drop-down list:
|
| Number of payments | Choose the total number of payments made during the currently selected tax year. This is initially defaulted according to the selection that is made in the Payment frequency list. You can change this default setting. |
| Individual payments | Enter the gross amount of the payment. |
| Total for year | This defaults to the Individual payments amounts multiplied by the Number of payments in year. |
| Option | Description |
|---|---|
| Relief claimed |
This will be automatically filled in with the Gross amount. The amount in this box can be amended but cannot exceed the Gross amount. The amount included here will populate the relevant box on the tax return and will be used in the tax calculation for the tax year. |
How do I get here?
Reliefs > Pension contributions > Retirement annuity contracts
What's this page about?
Use this page to enter details of payments to Retirement annuity contracts.
Both employees and self-employees can claim tax relief as a deduction from their earned income for payments to a retirement annuity.
Contributions are made gross and relief is given by deduction from the client's taxable earned income.
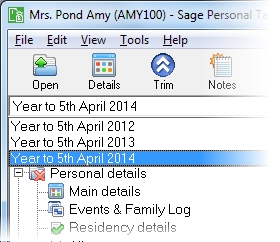
The tax year that you are entering details for is shown at the top of the data entry page. If you want to change the tax year, you should select a new date from the drop-down list at the top of the navigator.
-
Auto calc - If you tick this option, the calculations will be automatically completed for you where possible. If you untick this box you will see a new tab appear called Summary.
Note: Not all data-entry forms have an Auto calc option.
- Estimated - Tick this box to indicate that the figures you've used are estimated. This will then show on the item in the navigator, and at the higher level folder in the navigator by showing a small e.
- Complete - Tick this to indicate that the form is complete. A green tick will appear on the item in the navigator and at the higher level folder in the navigator.
If you want to close the page without saving any of your changes, you can click Cancel. If you were adding new details, then nothing will be saved. If you were editing an existing item then the page will close, reverting to your previously saved details.

